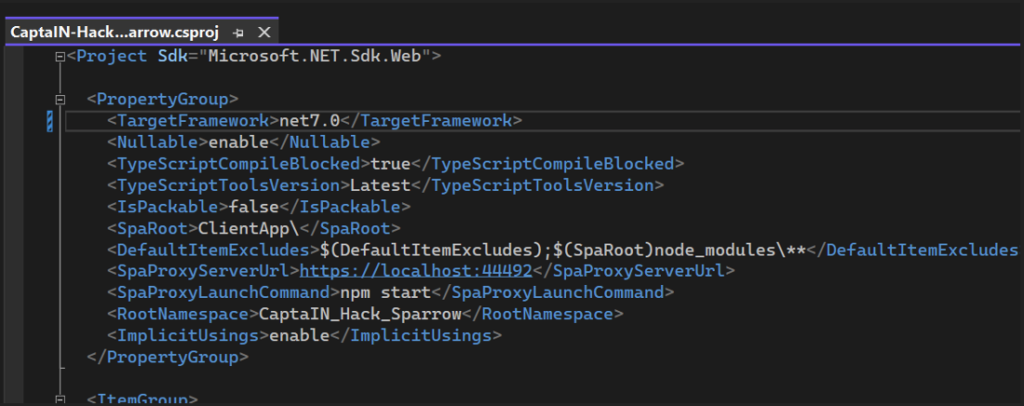
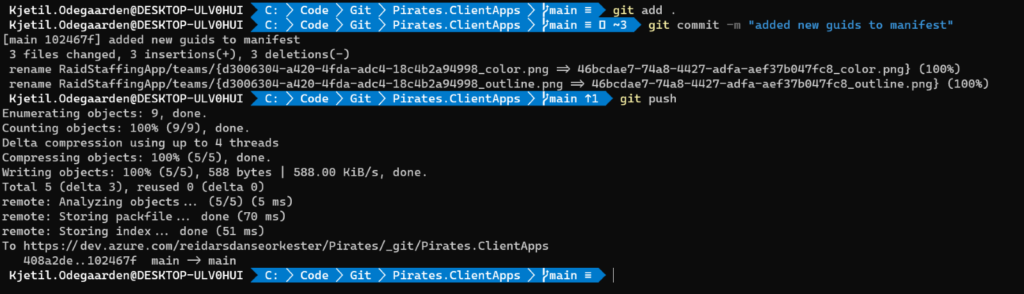
Sailing is though, so you need to rigg your ship to your advantage, preferably automating your sales and having people walk the plank for making bad code. We chose to created a project with ASP.NET Core application running with React.js. The application is running on .NET version 7 and uses several technologies, both hip and retro.
Screen capture of the .net SPA application setup
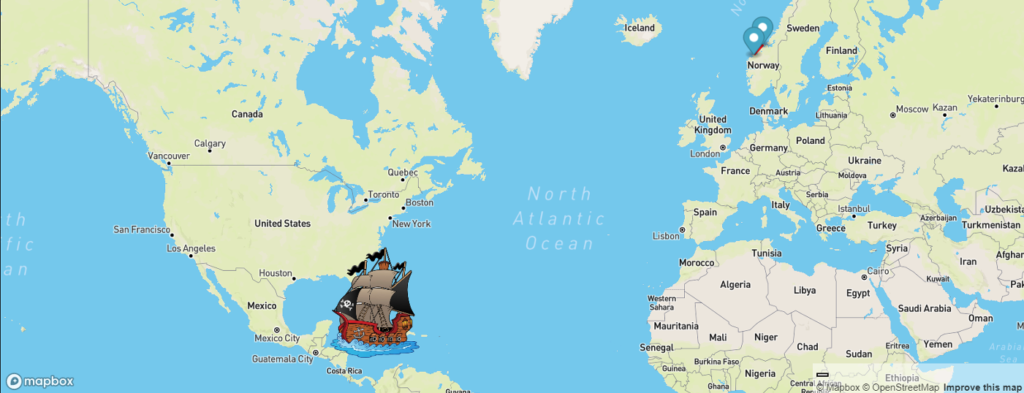
Mapbox for Charting the Seven Seas
Our application uses Mapbox – a provider of custom online maps for websites and applications. The company provides APIs and SDKs to create custom maps, add markers and other map controls, and to handle user interaction with maps. This ease of use and their clean and well-structured documentation (docs.mapbox.com) made Mapbox our top dog for create, edit and manipulate maps in our service.
Map created using Mapbox’s API
Protecting your Shared Booty form the Crew
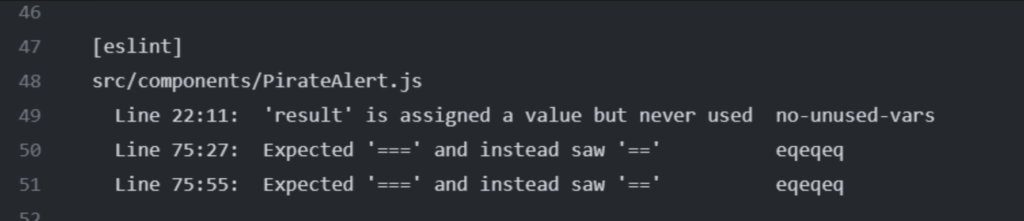
Any pirate needs a secure lair, a pirate code and ability to help other pirates in need. For this reason we created a repository in GitHub and implemented best practices for collaborating as developers, like proper branching, build pipelines, linting and pre-deploy checks. Like blocking ourselves from bloat because we can’t have unused code in the repository.
Snipet showing lint error for unused variable
Branching Strategy for Division and Conquering
The master branch contains the production code. All development code is merged from develop into master. Cutting corners in true hacker style we opted to not use feature branches, since, to be frank, the entire thing is a feature at this point.
What we all said when discussing feature branches
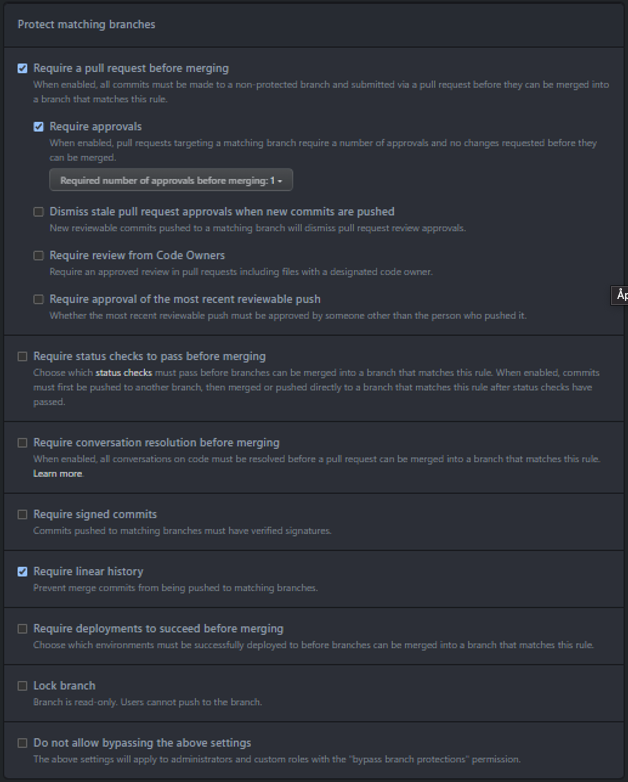
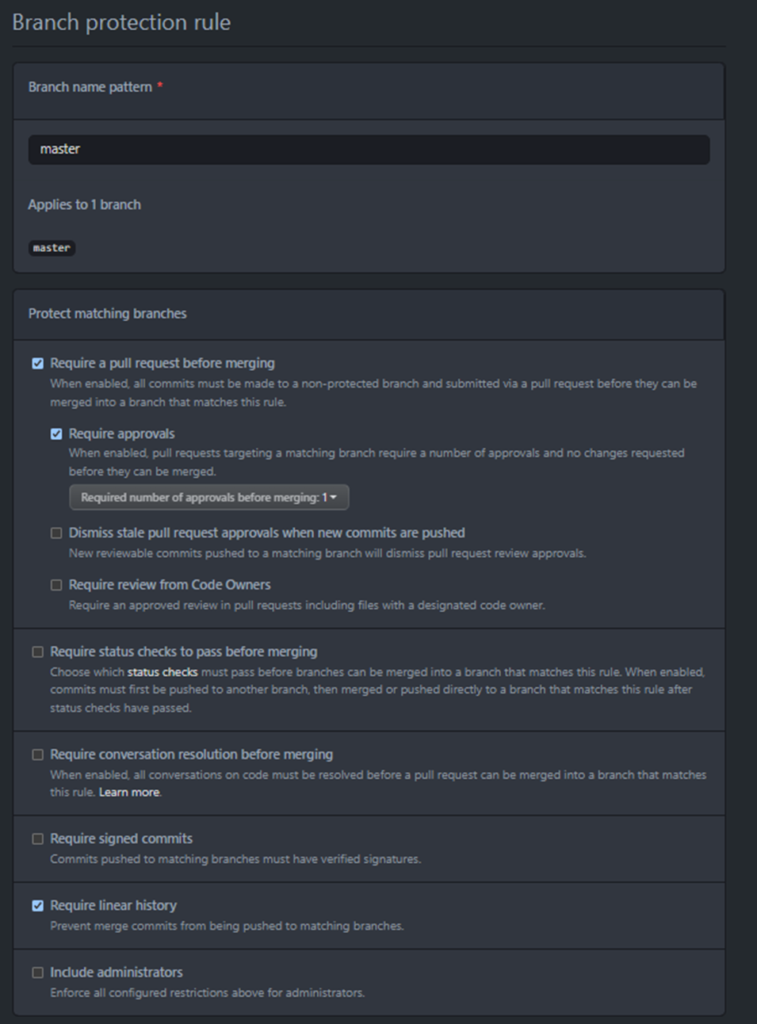
All branches are protected with protection rules. Due to the limited size of the project we can automatically merge features and bug branches directly to develop, but we can’t push directly to develop. Even that is too risky for this group of mad lags and girl. If you want to merge code from develop into master you need approval from at leaste one other developer and no changes requested to your merge, if all flags are green Github forcefully collides the code together and see what sticks (it’s actually more sophisticated than this, but you Judges know a lot more about this than we ever will, so we humbly just call it “magic” – just like magnets).
Parchment showing the Law of Protection for our Master Branch
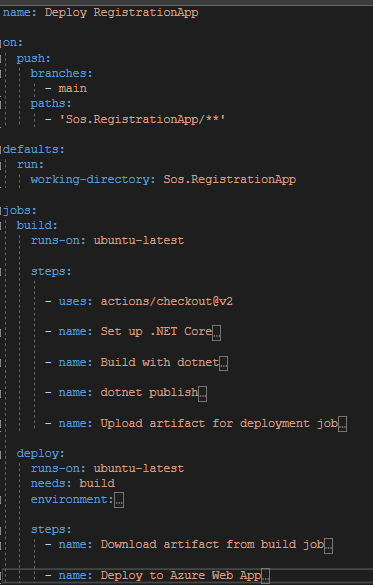
Github Actions is a now a CI/CD platform that allows developers to automate their software development workflows. This, for us, is a huge win because we want to do as little configuration as possible!
CI/CD github actions
The actions reduce the time and effort required for manual processes and enables us to release new features and bug fixes quickly and confidently – Harr harr, got you matey, you thought we will fix bugs! … But … for the sake of argument … if we were to fix bugs, this powerful tool for streamlining development workflows, enables us to deliver high-quality software more efficiently and effectively at lower cost – Better use of time, reduce waste of time (WoT) and better business value for the client. We used yaml to tell what GitHub actions should create:
Yaml file describing what GitHub actions should create
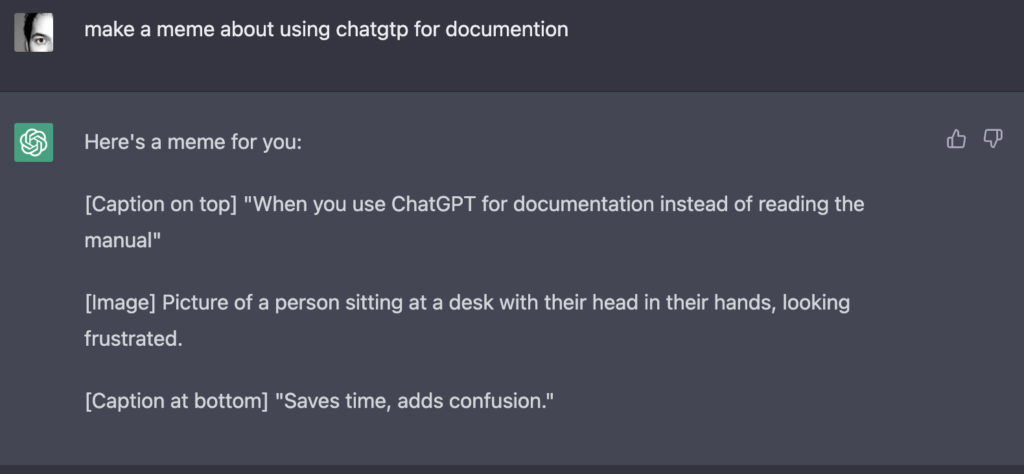
Creating Overly Complex Gadgets to Avoid Simple Tasks (aka How we used ChatGTP to give us documentation on Pulumi)
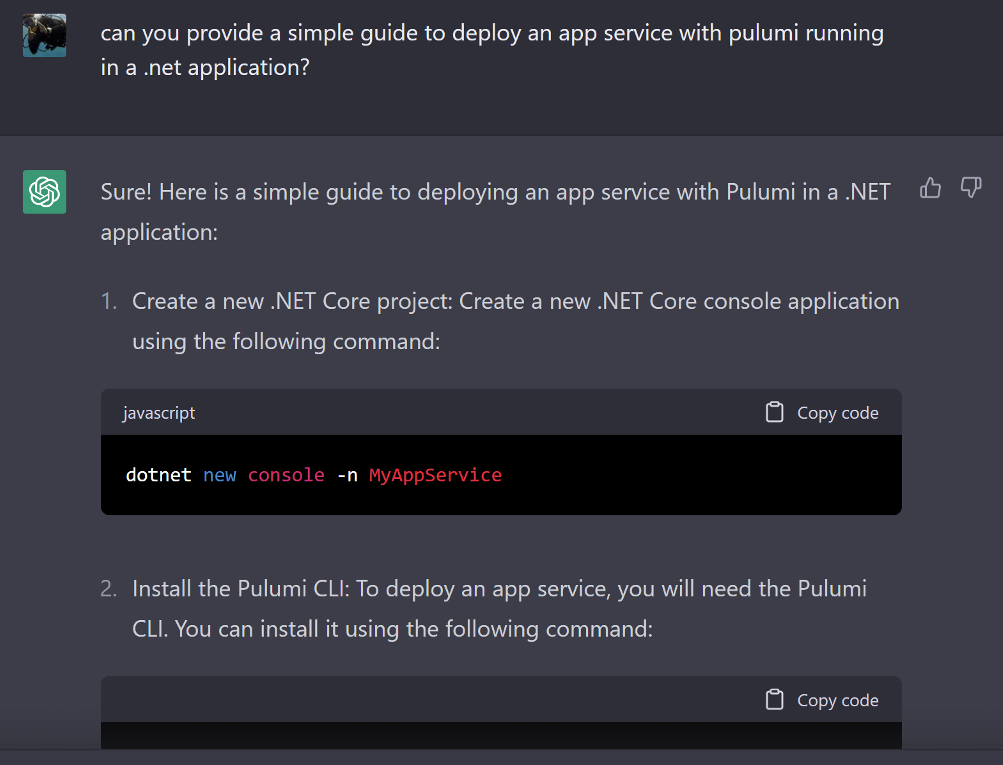
Nobody likes to know stuff. Everyone loves AI. What about AI that knows stuff?! Sold!! We used the AI service to provide us with documentation on how to deploy infrastructure in Azure with code.
Asking the oracle about stuff we probably already should know
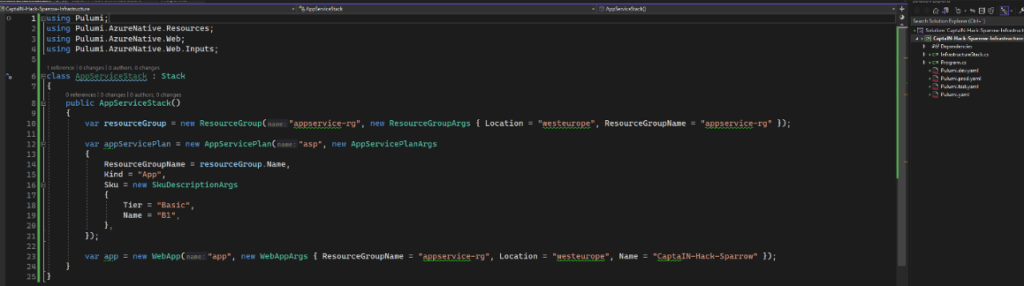
From this we were able to write code that could be executed in our CI/CD
Pulumi snippet for creating our environment: Infrastructure as code #retro
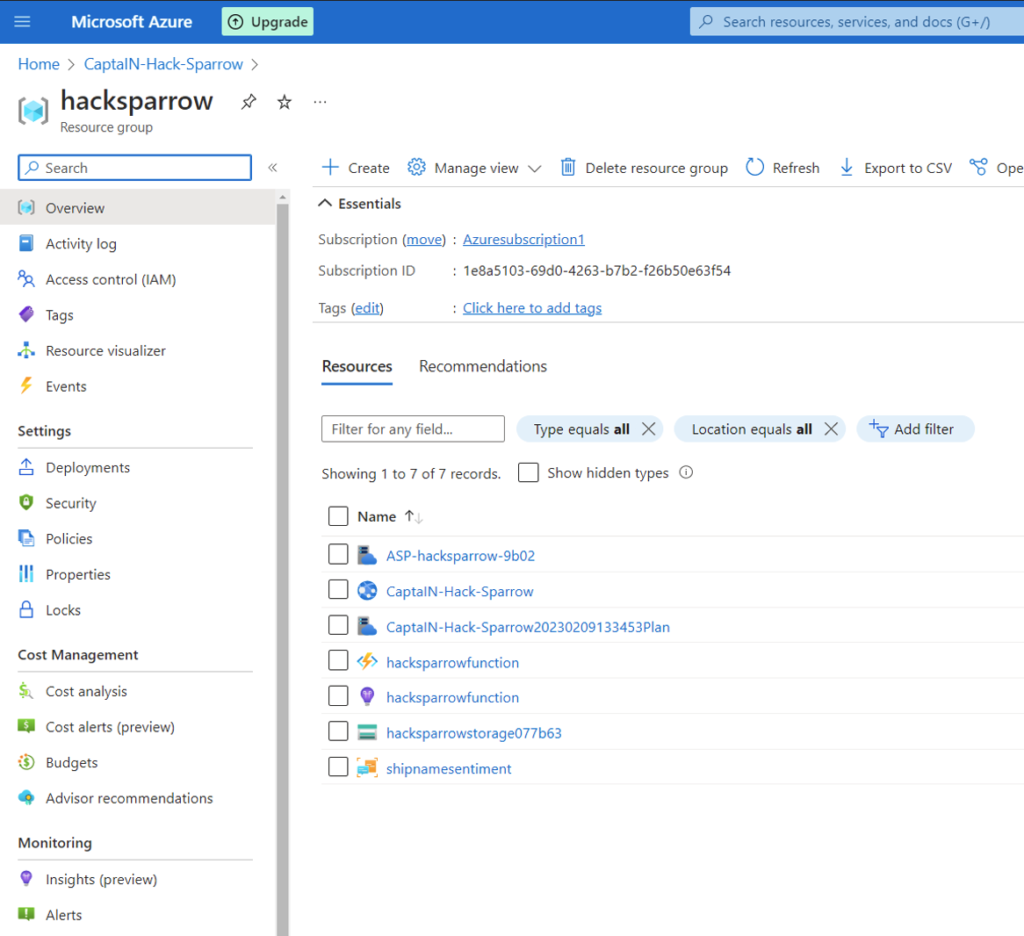
Resulting in a beautiful environment and ample time for coffee ☕️
Screen grab showing the employed resources in Azure Screen grab showing ChatGTP making a meme about making memes about using ChatGTP. Very meta.Mame created from ChatGPD’s instructions
Arrr, ’tis true what ye say. In this age of Artificial Intelligence and large language models, ’tis important that we share our learnings and explorations with fellow scalawags for innovation.
We hope Evidi releases the Kraken of Nvidia image generation prompting… and ye’d best keep that shenanigan within pirate domains!
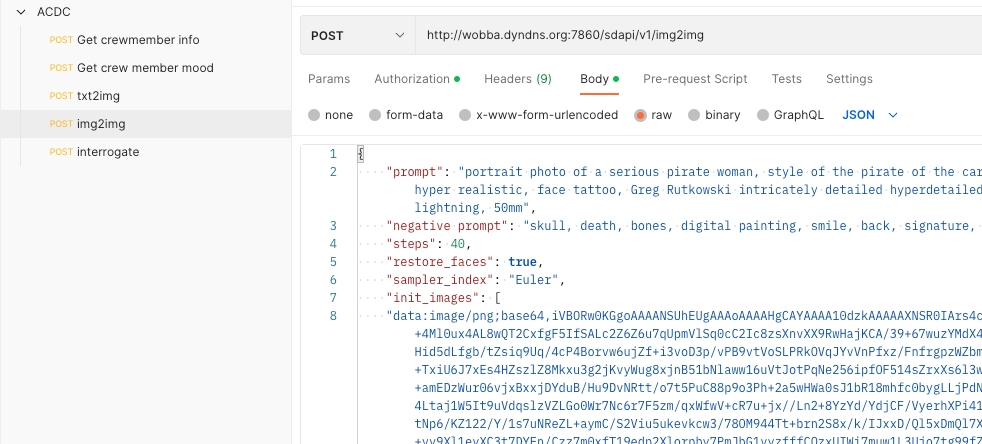
When harnessing tha powers of prompting, we keep our sample API requests tucked away in a Postman collection. Easy to use, easy to share! #ShareAlike, me hearties! #Sharin’BeCarrin’!
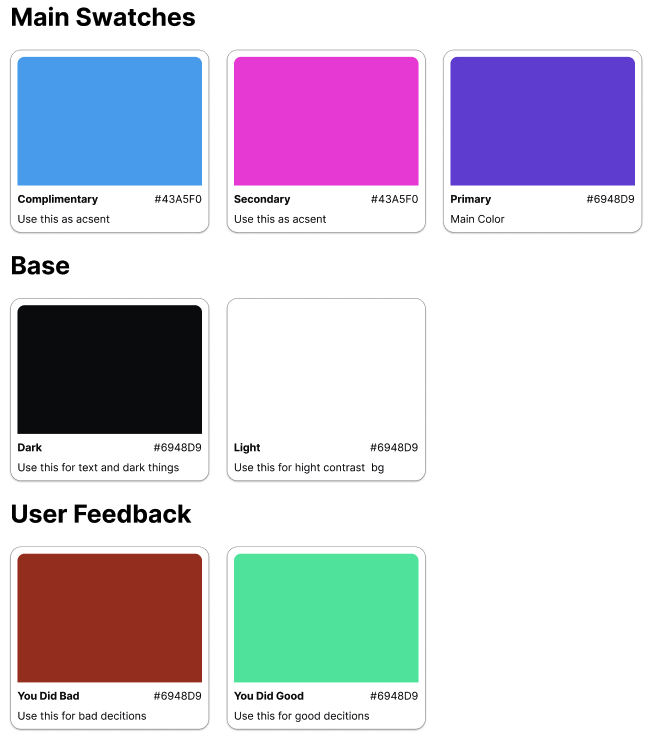
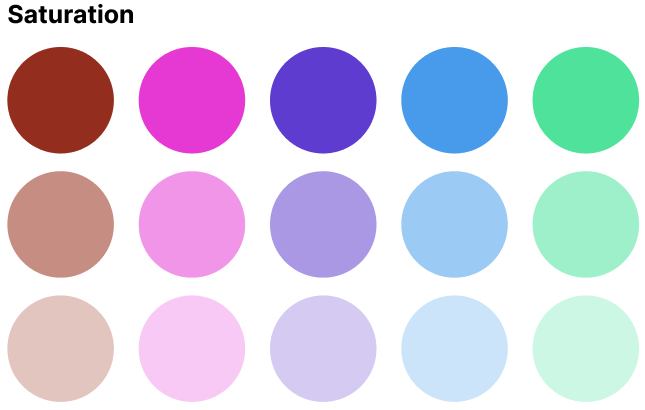
Colors are an important part of the User Experience, however there are more to design than colors. Let us dig deeper into our color pallet for this app.
UI Color Swatches with descriptions for use from the UI design tool Figma.
Our Swagger of Cloth Sebastian has shown us some tricks of the trade. Where other teams have opted for machine learning to create their color template, Sebastian has chosen for Adobe Color – a tool for mixing beautiful color pallets.
Screenshot from Adobe Color
The pallet was mixed using our Captain Mats’ favorite color: Blood red (or a slightly rusted maroon if you like) as the base. Then for electric flair we skewed the color pallet using Analogous color harmony towards the violet spectrum. Since the maroon is quite soft this results in a calm nautical palate with some poppy vibes towards pink and green.
Building on the swatches we made de-saturated versions to help with shading and possible scenarios where we might need less color to achieve more in the design. Typical places would be illustrations and clustered sections that need soft, mellow containers.
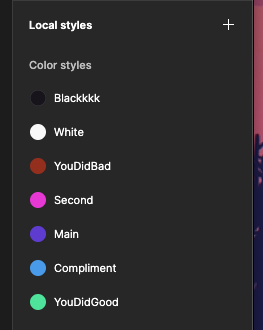
Implementing the Colors into a UI
Adding the colors as swatches to Figma’s color management makes et easier to try different colors and alter the colors if needed. We also named the colors with logical names, describing how they should be used rather than descriptive. Form experience and also rooted in best practise we find this way of managing colors more versatile and easier to work with than having explicit names, like “blue-bg-color” because what happens when your token has a descriptive name, and that description is no longer correct? You need to defector or just remember, both options are bad for speed,
Screenshot from Figma’s color swatch styles
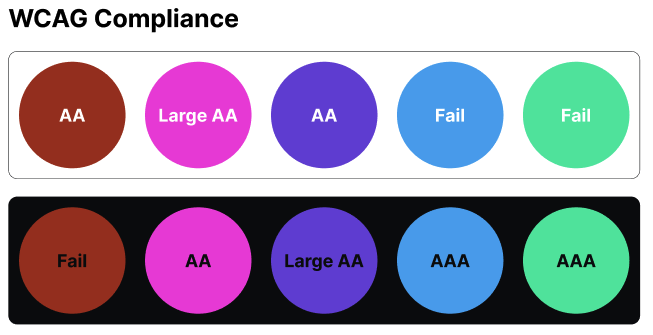
Lastly it is important to calibrate your colors for the visually impaired. One common tool is the WCAG color contrast guidelines requiring contrasts of 1:4.5 for normal text and 1:3 for large text. Sadly we can see our selected pallet is not optimal for all cases and still needs work.
WCAG compliance check for the color swatches against the darkest and lightest color in the pallet
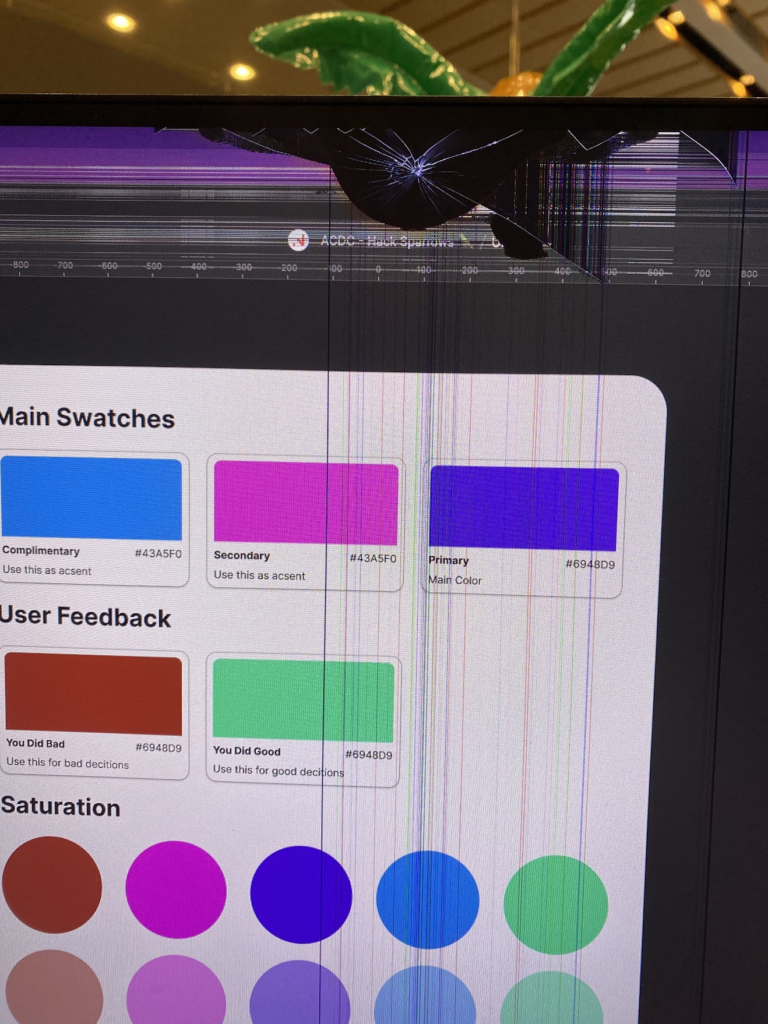
Also, the resident pixel pusher is very happy he has to hack all this together on a broken screen where everything looks janky. We are so bold to say this is living like a true swashbuckler, powering through this hackathon.
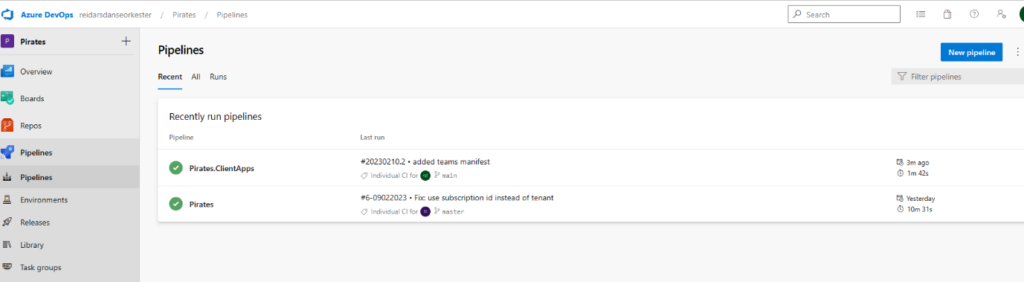
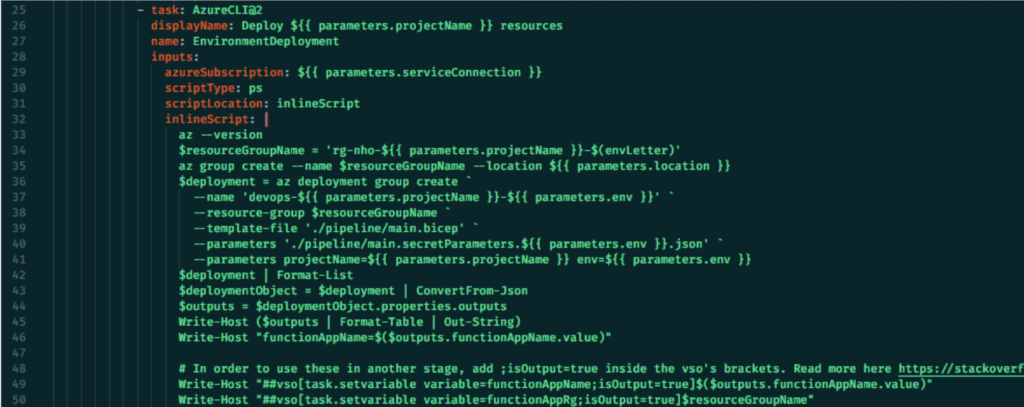
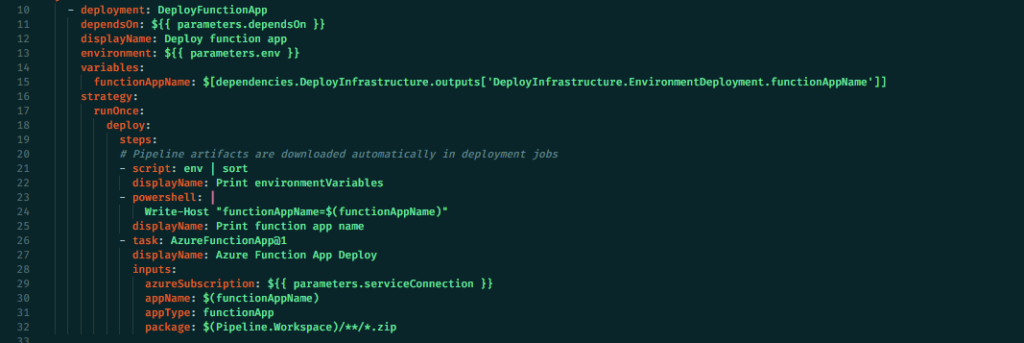
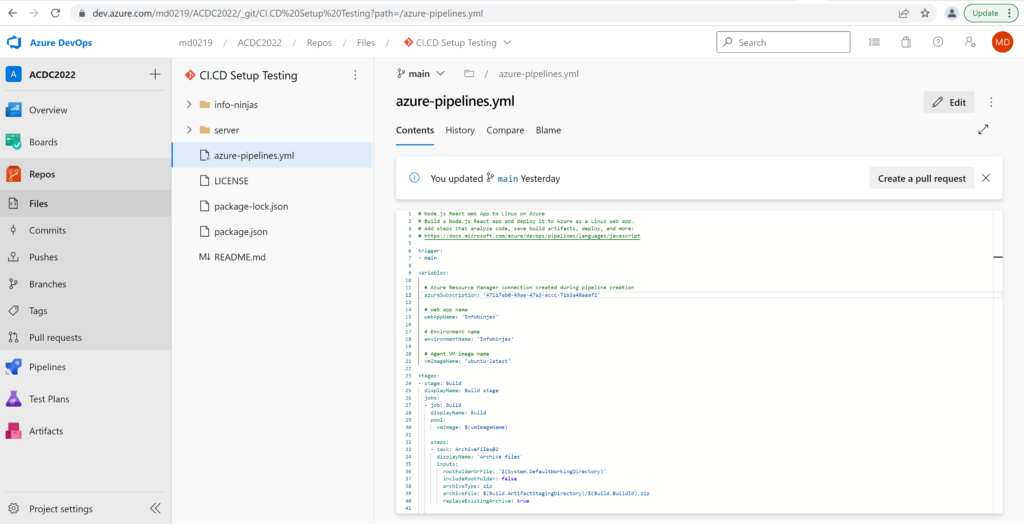
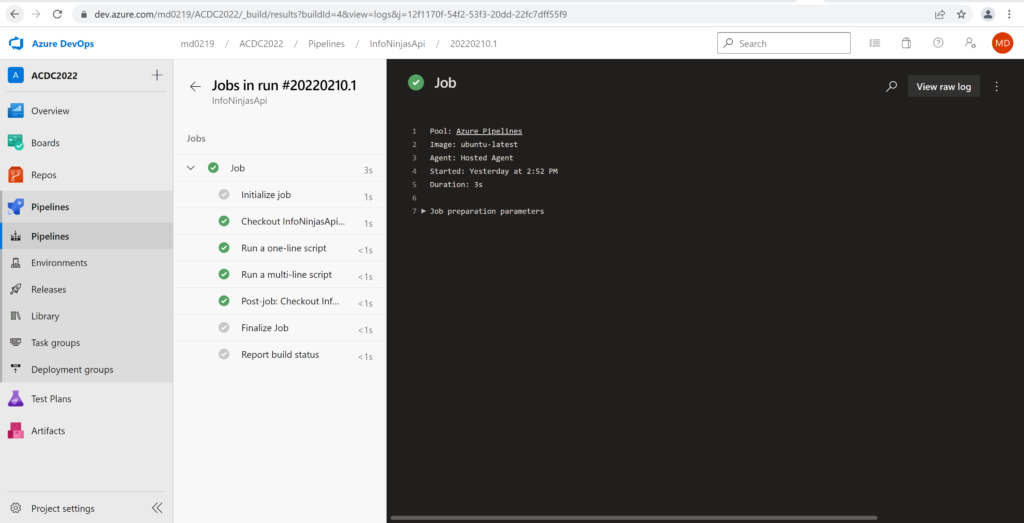
As part of our solution we are developing a Teams App for staffing raids, which uses an Azure Function App to get dataverse data. The toolchain setup for doing this consists of Visual Studio Code, Azure Devops Pipelines and Azure Services.
To speed up our delivery we have implemented a CI/CD pipeline that deploys the infrastructure and backend code to an Azure Function App. The process works like this
We develop a new feature with Visual Studio Code
We push the feature to the main branch
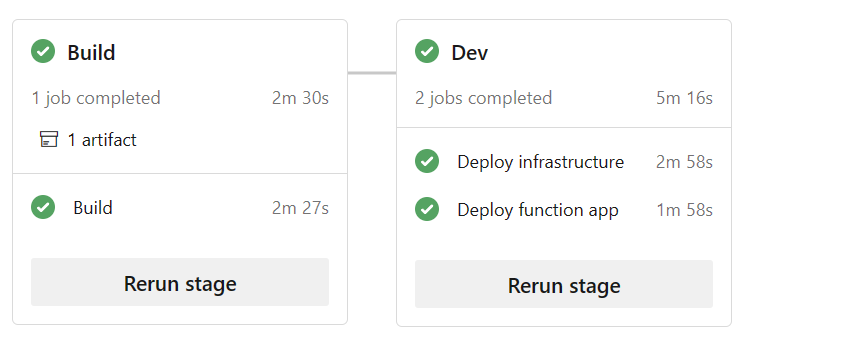
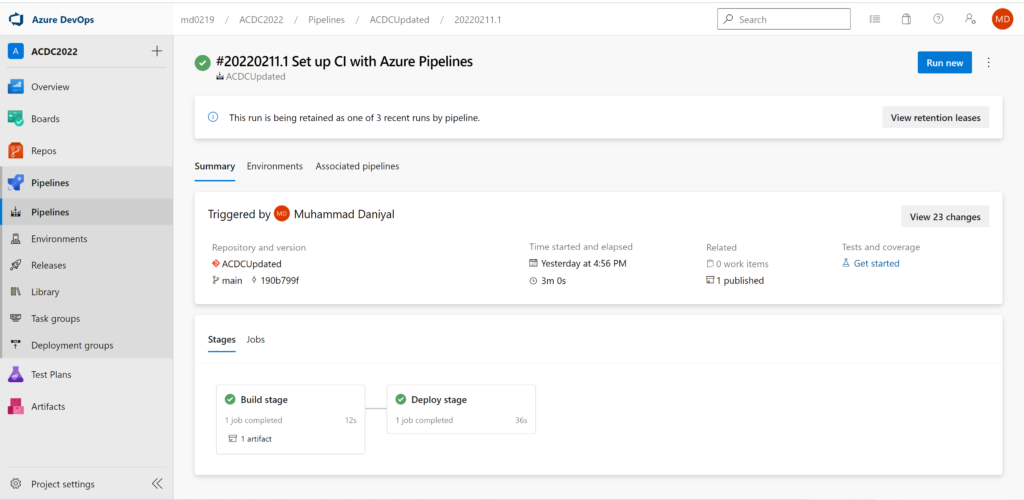
The Azure pipeline is triggered and executes two stages
Build stage
The .NET code is built as a deployable zip
Dev stage
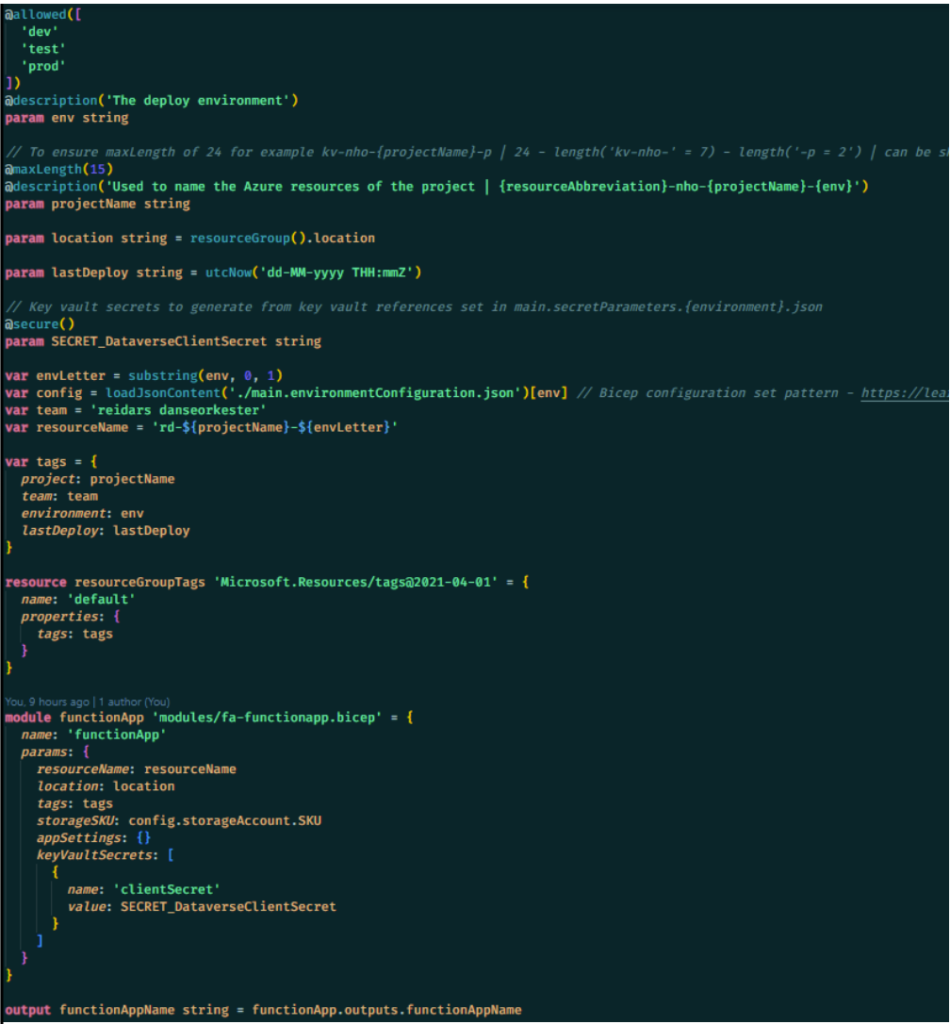
Then infrastructure is deployed with Azure Bicep
The zip is deployed to the newly created Azure Function App
We have modularized the stage jobs in templates, so we only need 9 lines of code to add another environment to our application.
To deploy our infrastructure with Bicep we use a Devops Service Connection to authorize operations with the Azure CLI.
Take a look at line 49 – here we read the output variables from the Bicep deployment in order to retrieve the name of the function app. We later retrieve and use this Devops pipeline variable in the job that deploys the code to the Azure Function App.
The infrastructure is defined in the .bicep file above which also utilizes other Bicep modules. In order to avoid explicitly including secrets we feed it from a Azure Key Vault. A link to the Key Vault Secret is passed to the Azure az group create command in a json file.
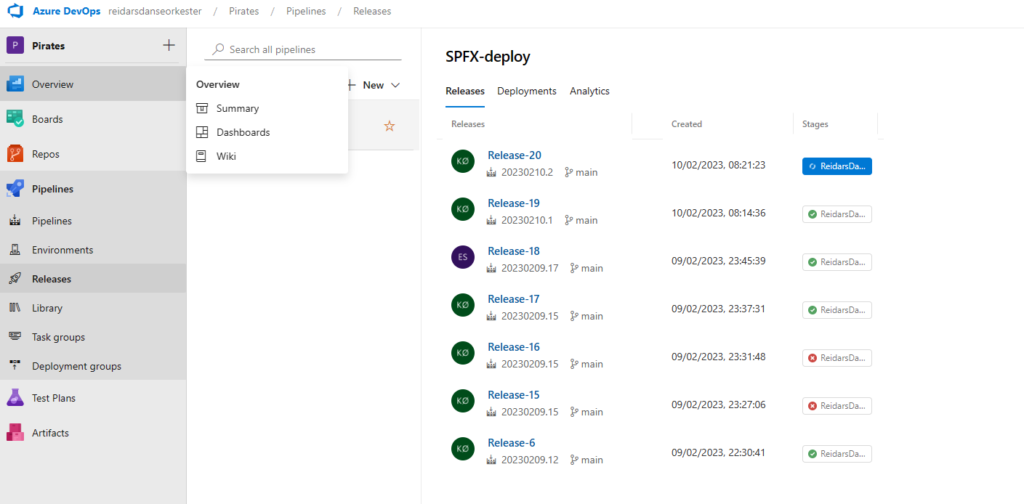
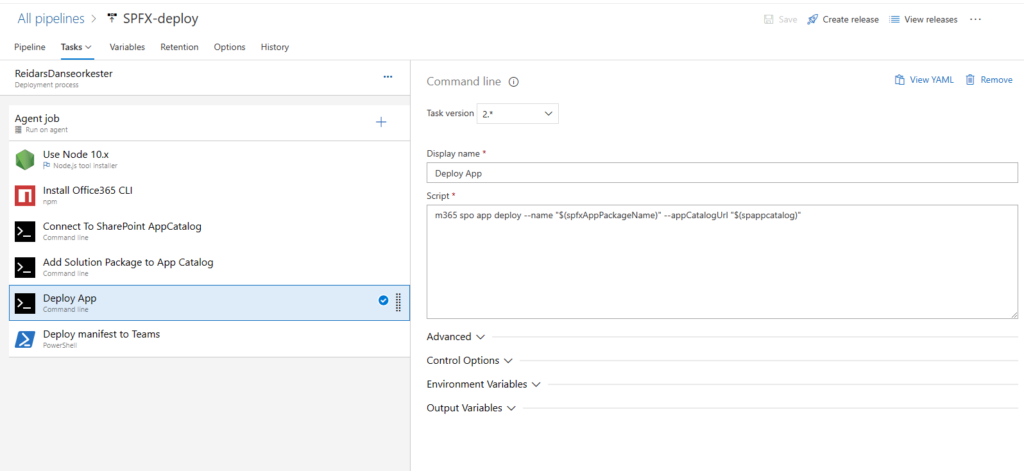
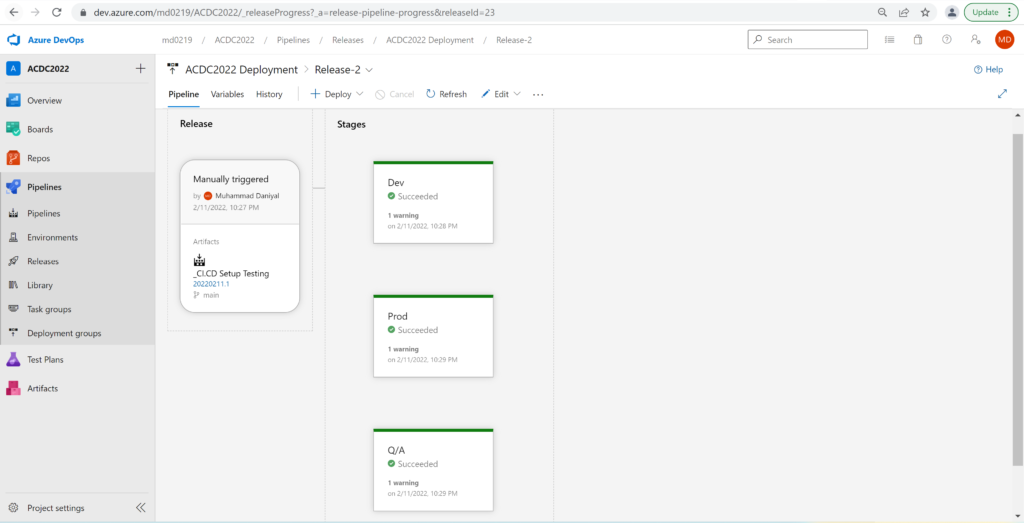
We deploy a frontend-app as well. The build is made and artifacts are created for the spfx-app and for the teams-manifest. We then have a release pipelines that utilize npm and m365 cli for deploying the app to the sharepoint app catalog and to Teams. The scripts are written with powershell.
For now it only displays basic pirate data from Dataverse
Figma, the hippest UI kid on the block, has a setting for components called “properties”. They are intended to mimic how we use properties in frameworks like React. However when working with multiple components and when swapping components they grant some extra value to the design process.
Updating multiple instances of the same component
Having properties for the values makes it easier to update multiple values though-out your design.
Remembering override values when swapping components
But more importantly, when using variations of a component the component remembers its override-values even when switching to a variant that does not have the same values in the component, making updating your design that much easier.
We came into this Hackaton with the idea that we could make the Onboarding process a lot less manual, a lot more secure and reduce the risk of human errors in the process significantly. And we’ll be honest, we are extreamly happy with the solution we now are traveling home with! The best thing you ask? It works like a sharm, every bit of it! We have tested it several times, and everything flows exactly as described! You can see the full solution under here, but we’ll start with a summary of why we think we should get a lot of points in the four different main categories:
Excellent User Experience:
Lets start with the help this will give to the employees already working in the company: – HR now will have a veary streamlined process for Onboarding, where all tasks that can (and should be) automated are just that. They don’ need to spend time sending out agreements, follow up with signature, enter a lot of information regarding the new employee in the system, follow up on other employees that forgets the tasks they have in an Onboarding. They don’t need to notify IT about a new employee coming it and wait for creation of user and access to systems. All of this happens automatically. Nothing is forgotten, no sensitive information is sent in emails or seen by someone who shouldn’t see it. – IT never needs to think about a new employee coming in anymore. Everything is automated and just happens. Isn’t that the best user experience? When you actually don’t have to do even one click, and the process still works? – Other employees in the company having tasks regarding a new employee coming in will be reminded of their tasks and make sure nothing is forgotten. Automated and nice. And, if they complete their task, no notifcation will be sent, it really is as easy as it sounds
And then, to the candidate starting. If the company implements this solution, everything will be ready for the new employee when he has his firsgt day of work. He can even get information about the company, his team, his manager and more in the Onboarding Portal before he starts, so we can keep up the good energy people feel when they are about to start working at a new company. The new employee will also feel that this company really takes care of their employees, and that they really are up to date in the digital world we’re living in.
Most Extreme Business Value:
The value for companies here are so high, that it’s almost difficult to know where to start. But, first of all, this saves a lot of time for the HR department. And, we really mean A LOT of time. Not just that everything is automated so they don’t need to do as much as they have to now to register a new employee, but they don’t have to push and follow up everyone else that hasn’t done their part and they don’t have to correct human errors that’s been done during the process. They can spend their time on something that is much more valuable to the company, and that is to make sure that all the employees already working here gets the best environment possible to do their job as best as they can! Lets face it, this is what we want the HR department to do, we don’t want them to spend time on entering data into a system. The IT department will also save a lot of time witht this solution, that they can spend on other things as well. Not that I work in our IT department, but I assume that creating users and assigning licenses and access aren’t the most fun task they do at work. So I would think this will actually make their workday more fun! Let’s just do an approxemently calculation of time saved. Create a contract for the new employee, upload it for e-signature, send it for signing, recieve it, ask the employee for more information so that it can manually be put into the system. Let’s say this totally takes 5 hours at best. Then someone needs to tell IT to create user and access and make sure that it have been done, a total of 1 hours. Then someone needs to follow up other employees, to make sure everything is done and ready for the new employee. This is maybe the most time consuxming, and I don’t think it’s wrong to say that this takes at best 8 hours in total during the time between someone signs and their first day of work. This means that time saved for just this one onboarding process is at least 14 hours. One of our customers typically hires between 10 and 20 employees every month, and this means that this solution will save them between 140 and 280 hours. Each month! To have an other example, an other customer of ours plans to hire 1.500 employees by the end of 2023… You do the math here!
Rock Solid Geeknes:
There are so many partws in this solution that works perfectly together, we almost can’t believe that we actually made this work as good as it does now. We seriously din’t think that we would be able to automate that many parts of the process as we have done now.
Killer App:
We have created this as a total solution, so that everything can be uploaded and used by all companies using Dynamics FO og Dynamics HR. With only a little personalization to make the wording, logo etc. fit the different companies, this can be set up quite fast. And, of course, each part can be implemented by it’s self too, if someone don’t want the whole solution. But, we know that this will be an easy solution to sell to our customers, as we know that a lot of them already really wants this!
The solution:
And now, finally, let’s go to the solution. You have been through a recruitment process in your company, and you have picked a really awesome candidate you want to send an offer to. This is what you do:
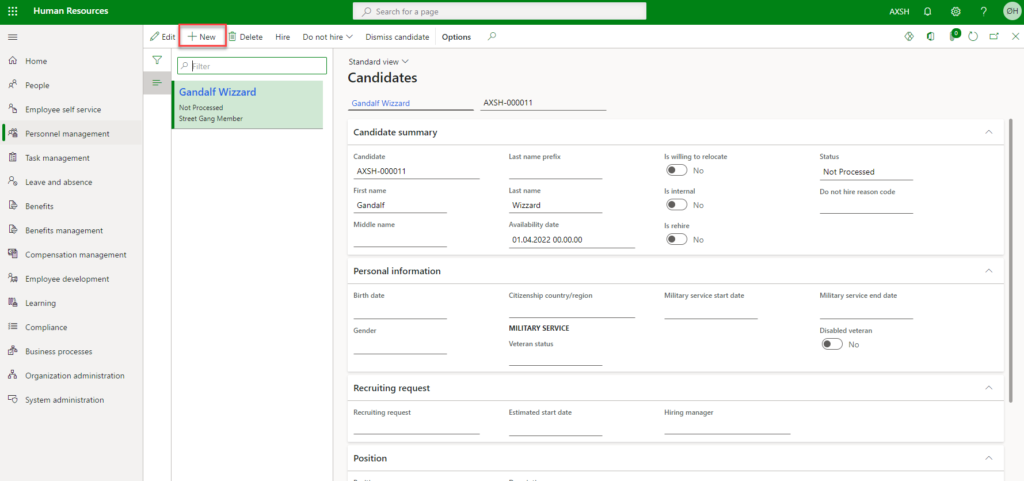
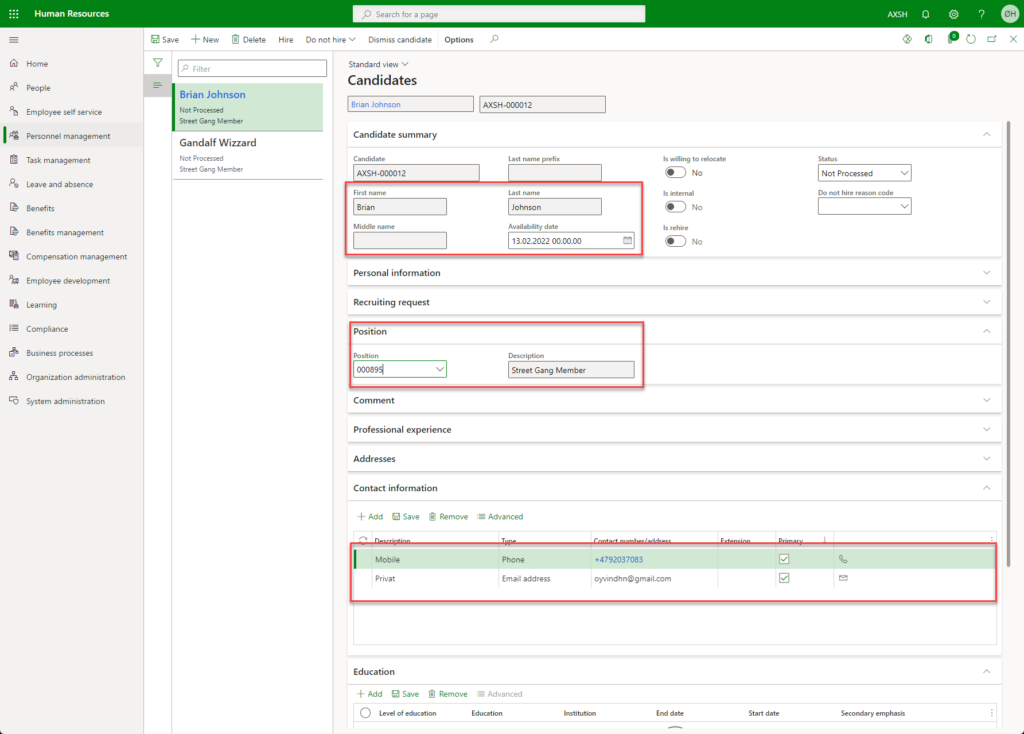
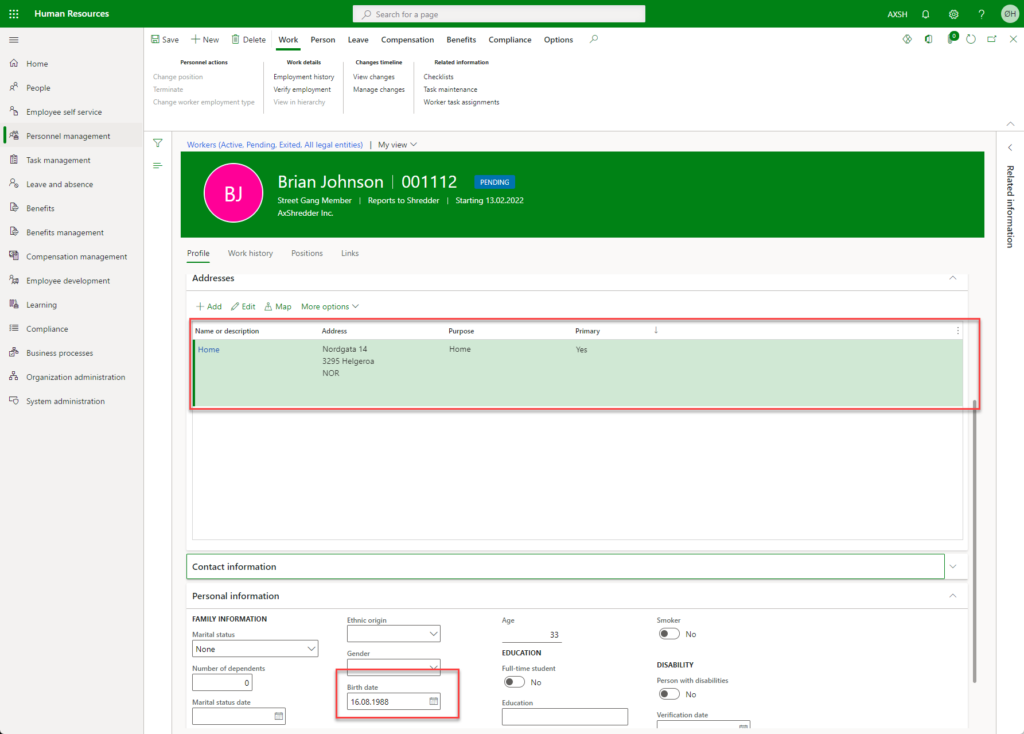
1: Create the candidate in Dynamics, and fill name, startdate, email address and phone number, and connect him to the position:
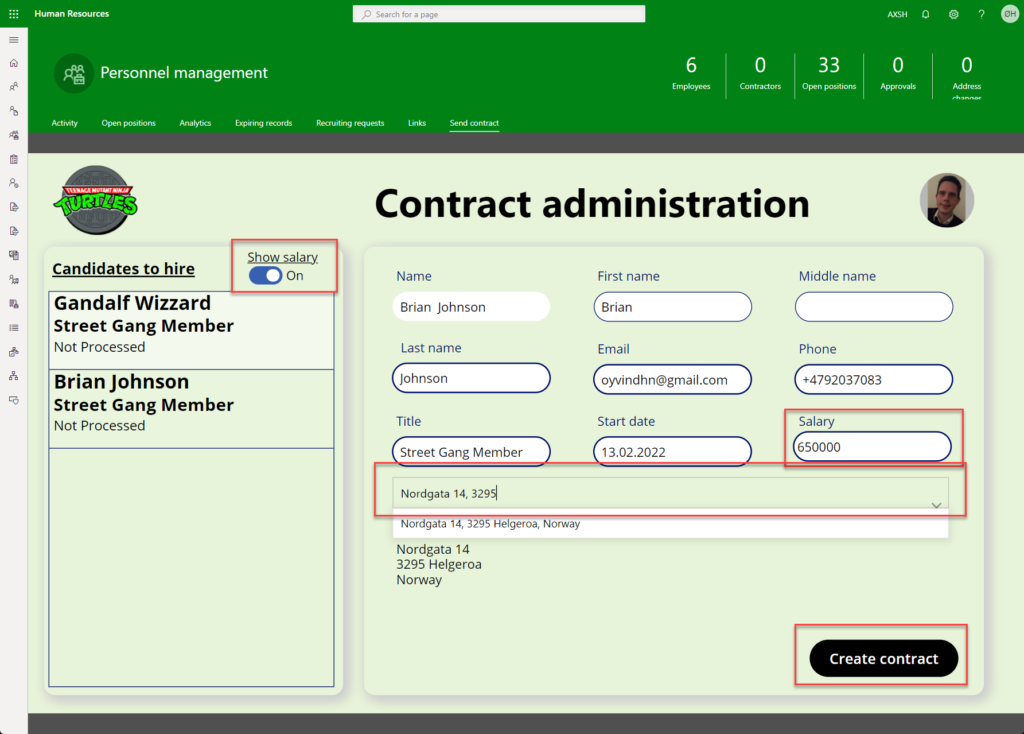
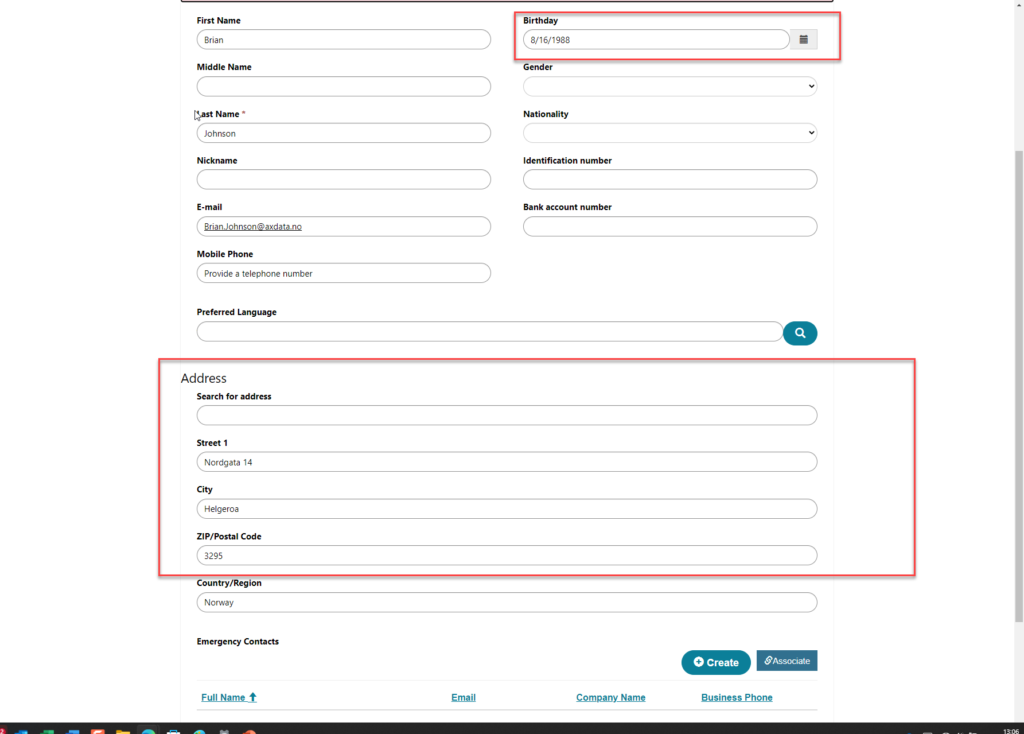
2: Use the App we have embedded in the Personal Management workspace to send an Employment Agreement to the candidate (for Dataminer and Crawler, we have here used GeoAppify address lookup to autocomplete adrees input from search):
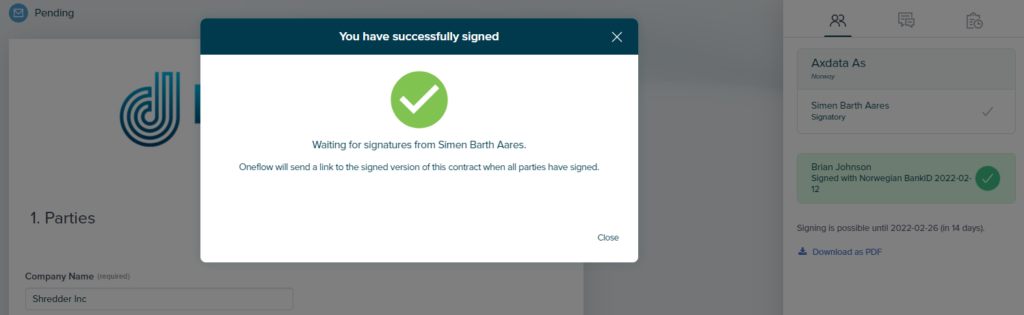
Like magic, the candidate resieves an email to view, update and sign the agreement. The Agreement is automatically filled with data from Dynamics before it’s sent out for signing, done through an API we created with OneFlow right here at this Hackaton:
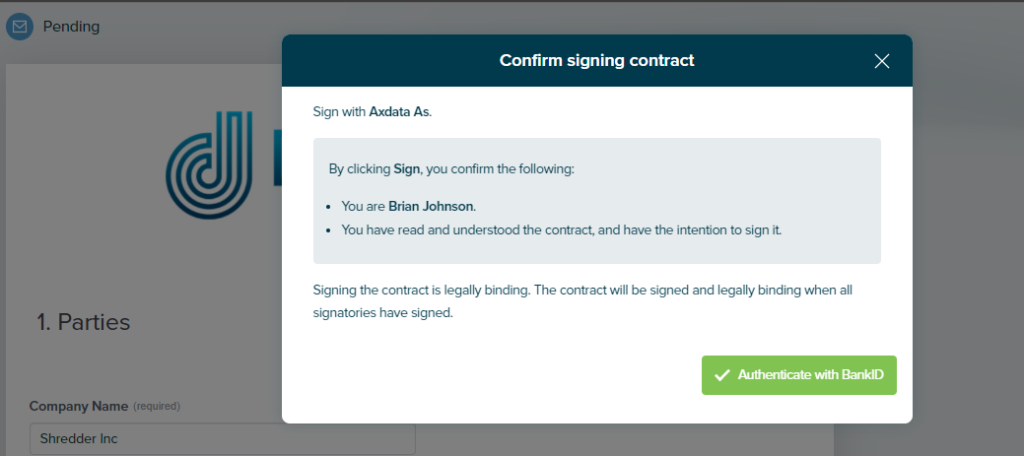
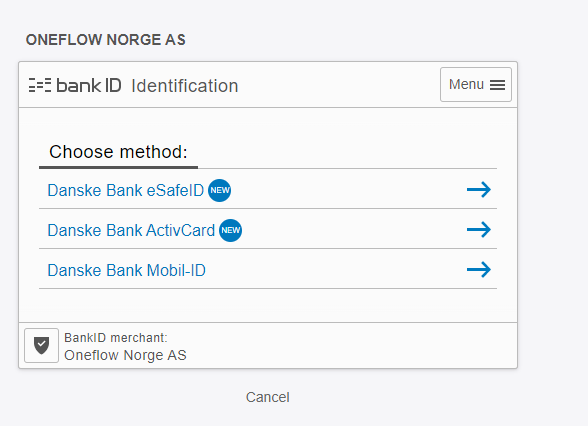
The candidagte fills in the National ID number, and signs the Agreement using Bank-ID:
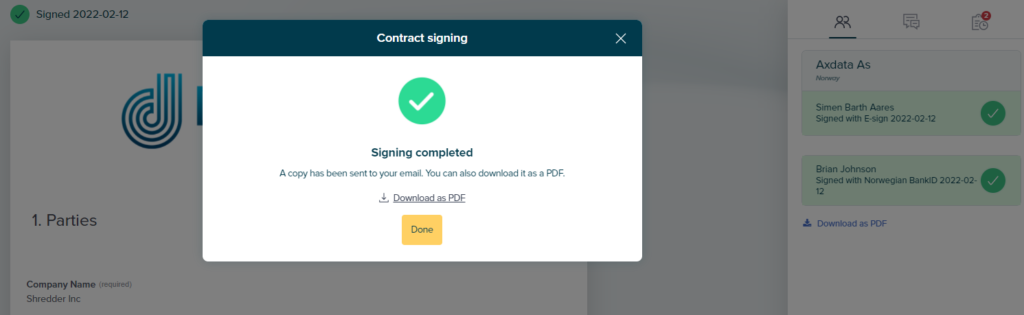
3: Agreement is signed by the company as well:
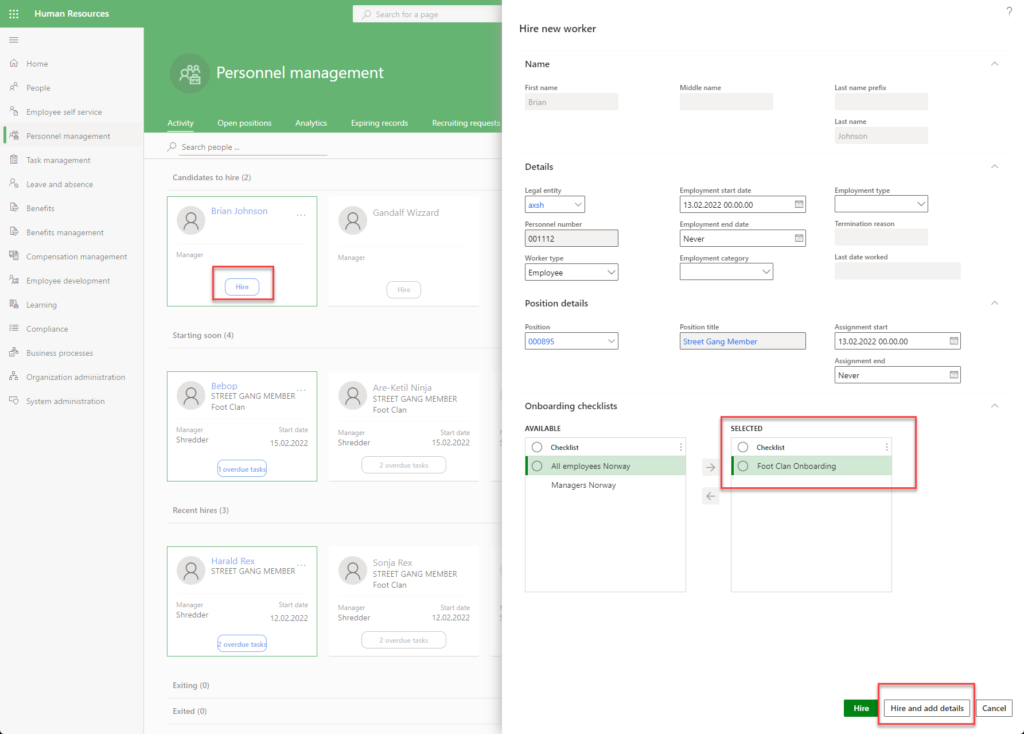
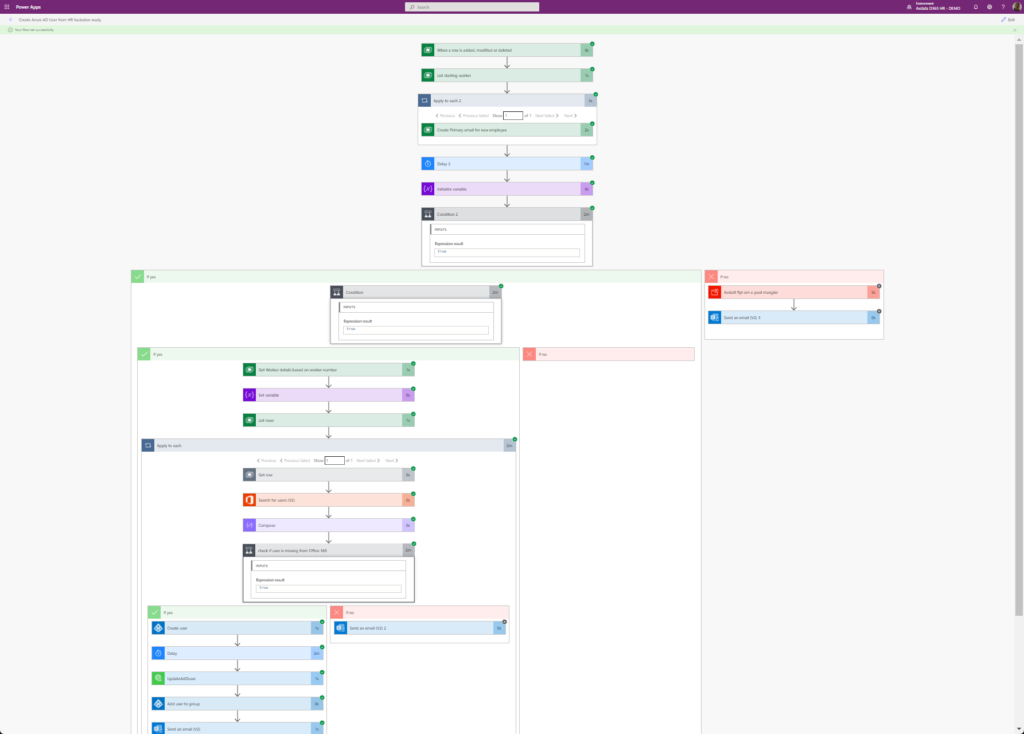
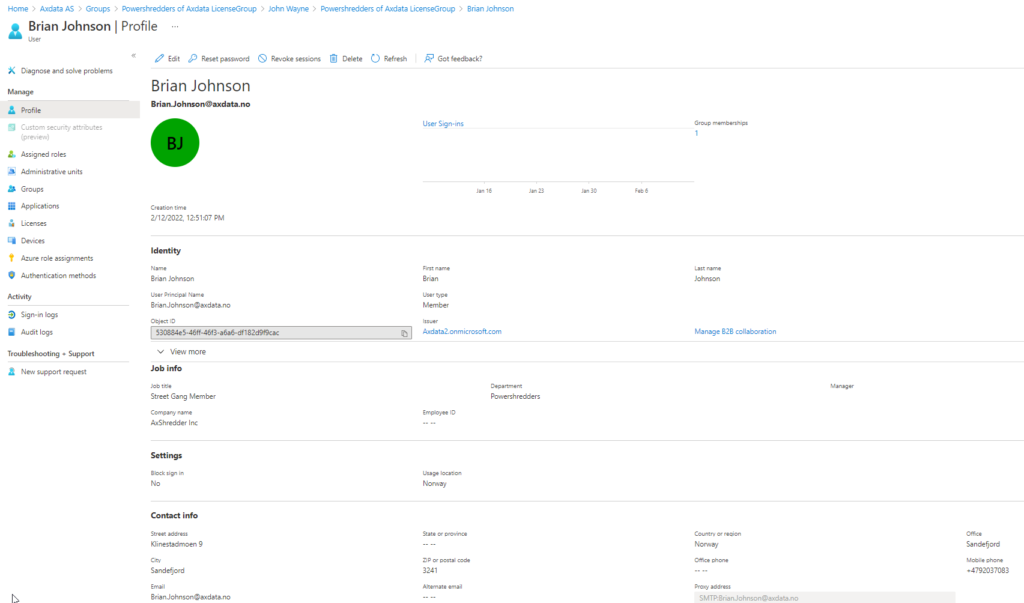
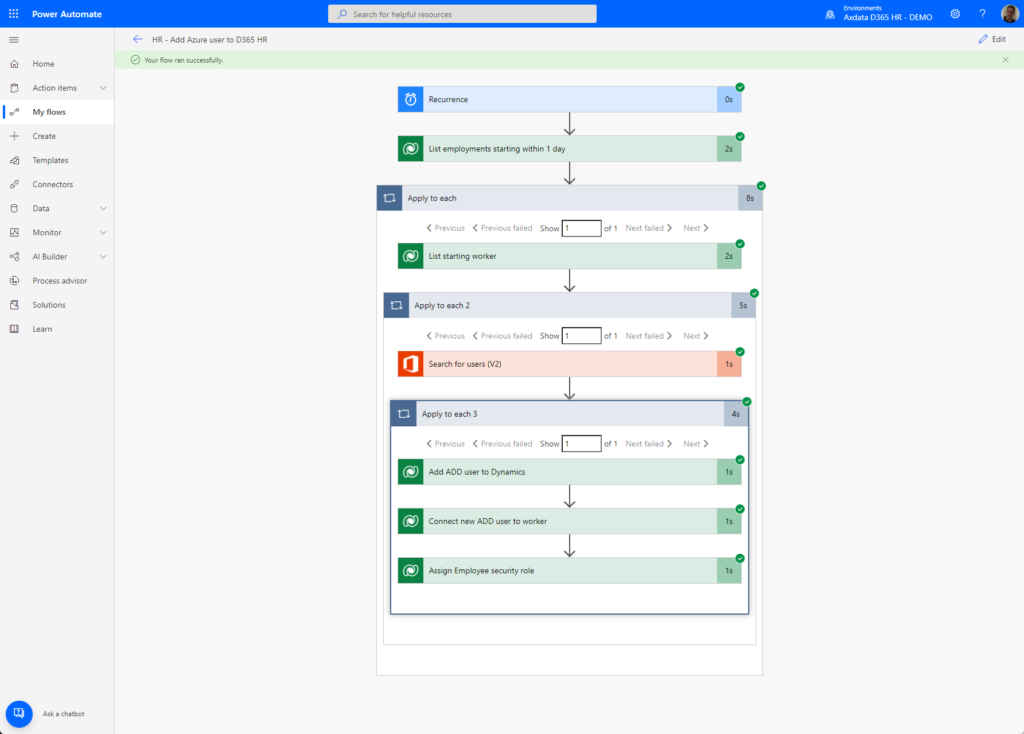
4: You Hire the candidate in Dynamics with two clicks, and assign the onboarding checklist that should be used for this canidate, and ticks the checkbox to create a user in Azure AD for the new employee:
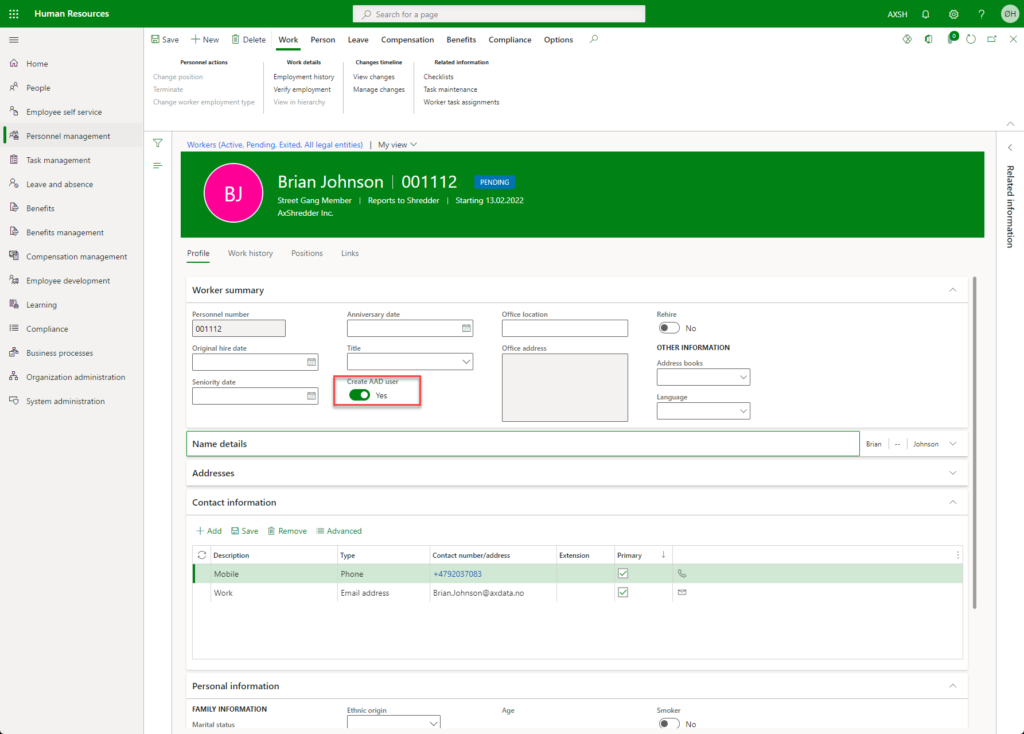
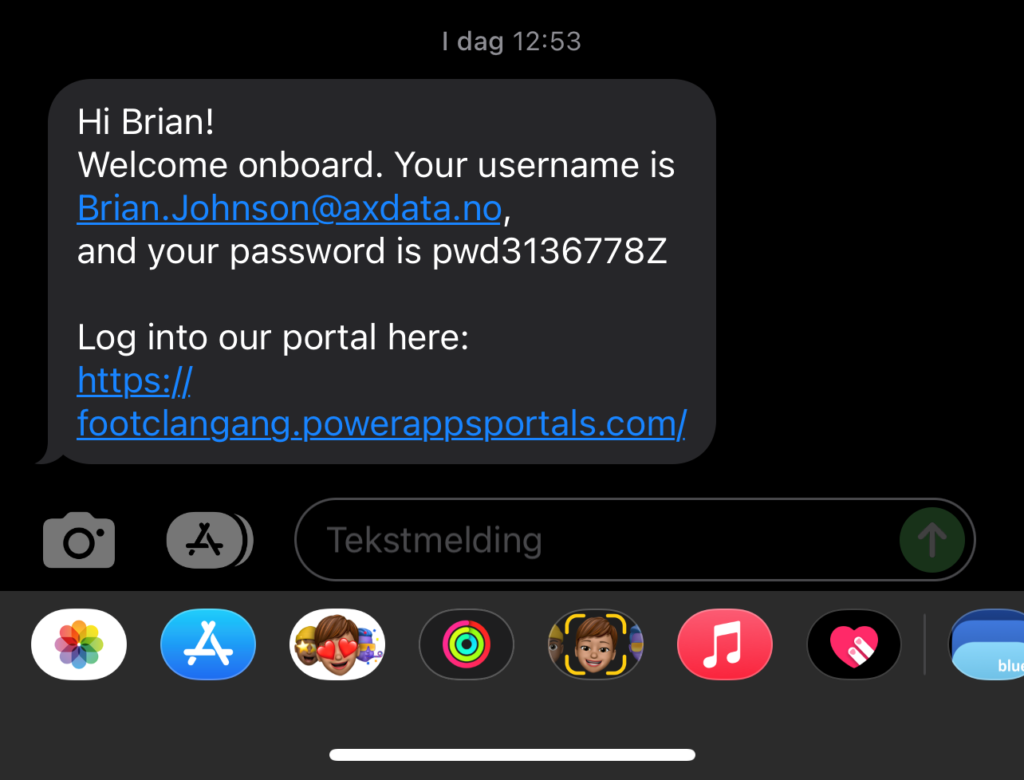
This triggers a PowerAutomate that first create a work email for the new emplyee, sets this new email as the primary email address on the Employee workspace in Dynamics and creates the Azure AD user for the new employee and assigns group and licenses to it, and ends with sending the login detail to the employee with SMS, together with the link to the Onboardig Portal:
And, of course we have created a PowerAutomate that will remind the employees in your company about the tasks they are assigned regarding the onboarding of the new employee if they don’t follow it up by themself:
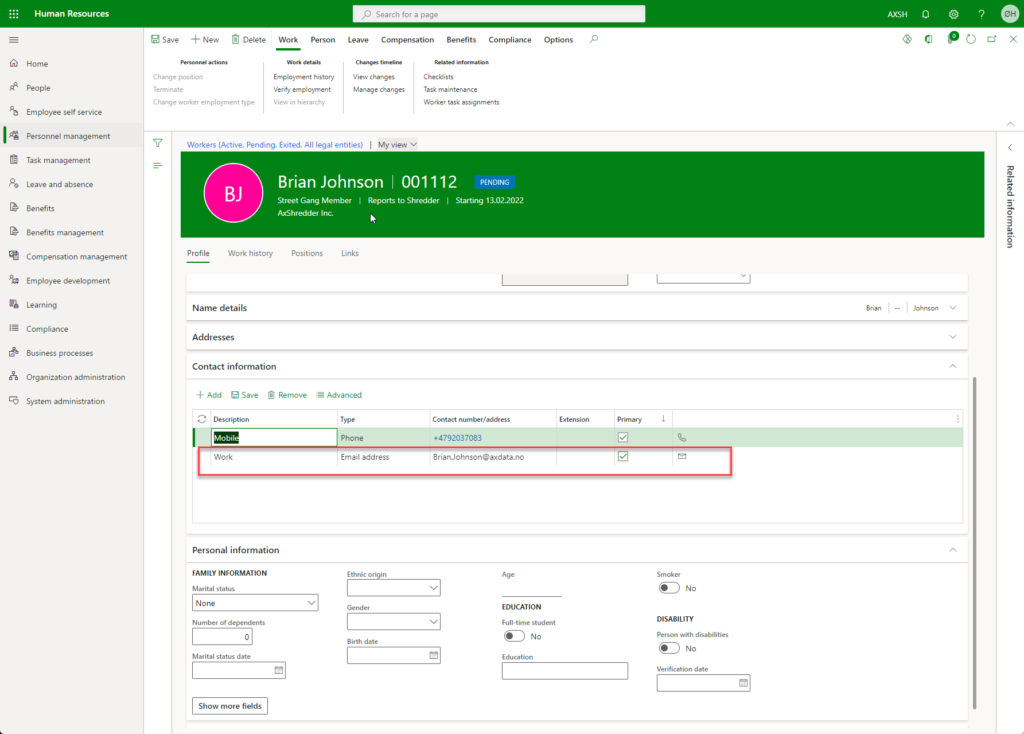
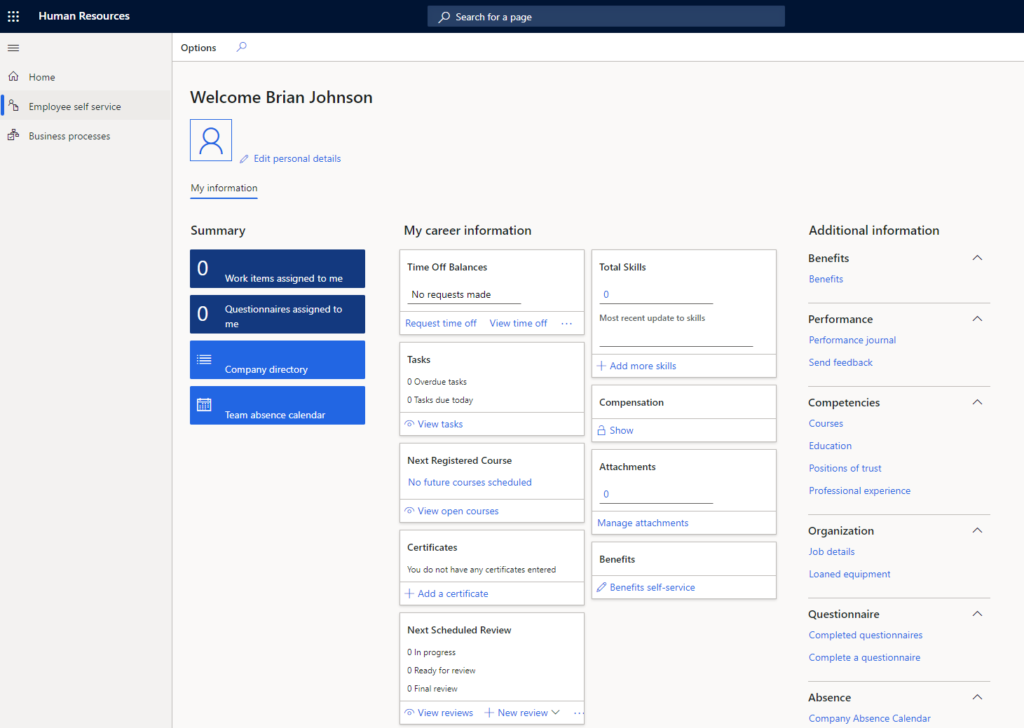
Now, the employee can log in to the Onboarding Portal (that works on all devices), and enter in more information about himself. When submitted, the data is automatically updated directly in Dataverse, and then becomes visiable in Dynamics within seconds:
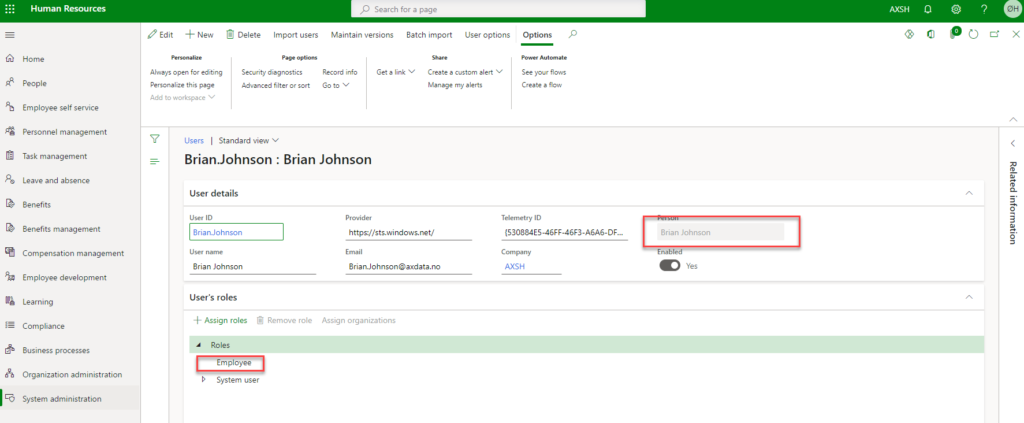
And, last, but absolutely not least, the night before the new employee has his firs day of work, a PowerAutomate runs and imports the user to Dynamics, connects the user to the correct employee in Dynamics, and assigns the security role Employee to the user so that the new employee has accsess to the Employee Self-Service workspace in Dynamics:
And, to end it all for now, we have automated the process for email signature, so that is is automatically put on every one of the emails you send out. Now they finally will lokk the same for the whole company:
The signature itself is created with HTML-code, after a rule is created in Exchange
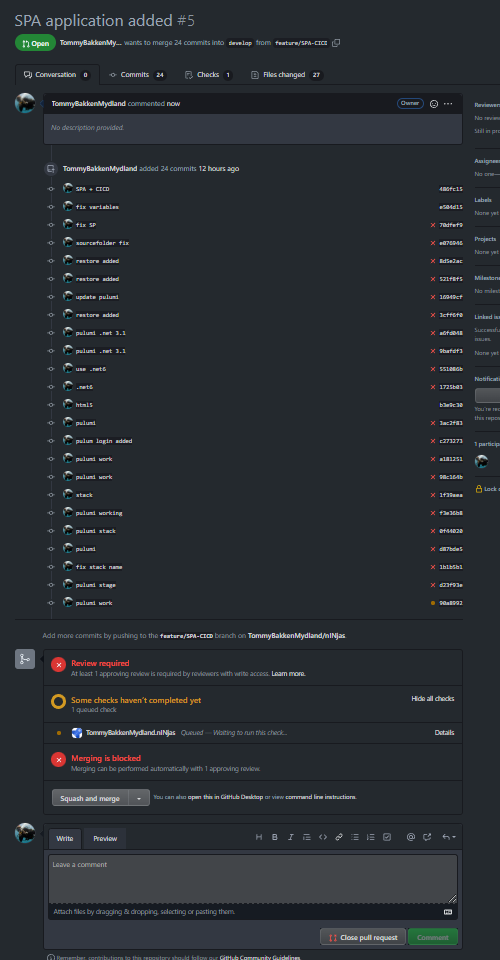
Det er opprettet to brancher i vårt github repo. Develop branch som holder kode for dev miljøet. Master branch som holder kode for test og prod miljøet. Det er implementert regler som krever at man setter opp PR, og for å kunne merge koden til develop må en annen utvikler godkjenne koden. Det er også implementert build check som starter automatisk når man setter opp PR, slik at man unngår å merge inn kode som vil feile i CICD.
Github branch policyPR to master with build check
Mappestruktur
/nINjas
Inneholder vår SPA applikasjon med React og .NET6
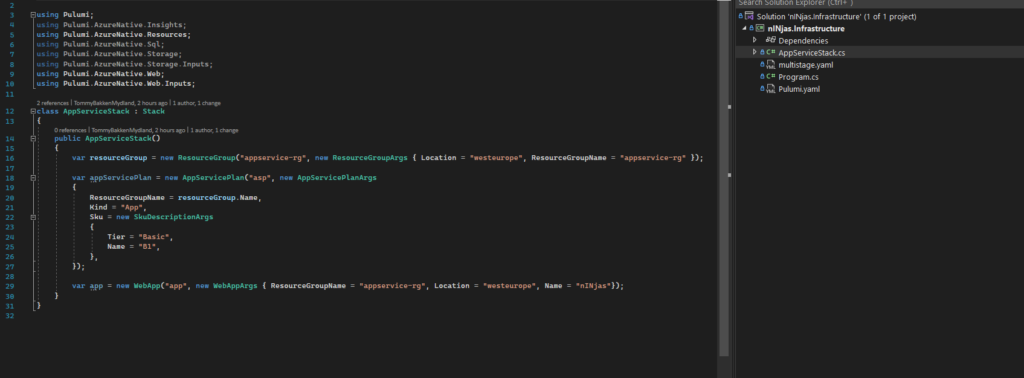
/nINjas.Infrastructure
Inneholder ASP.NET med Pulumi
/python
Inneholder pyton kode for å ta bilde med rasbery pi og analysering av bilde
Infrastructure as code with Pulumi
Pulumi with ASP.NET
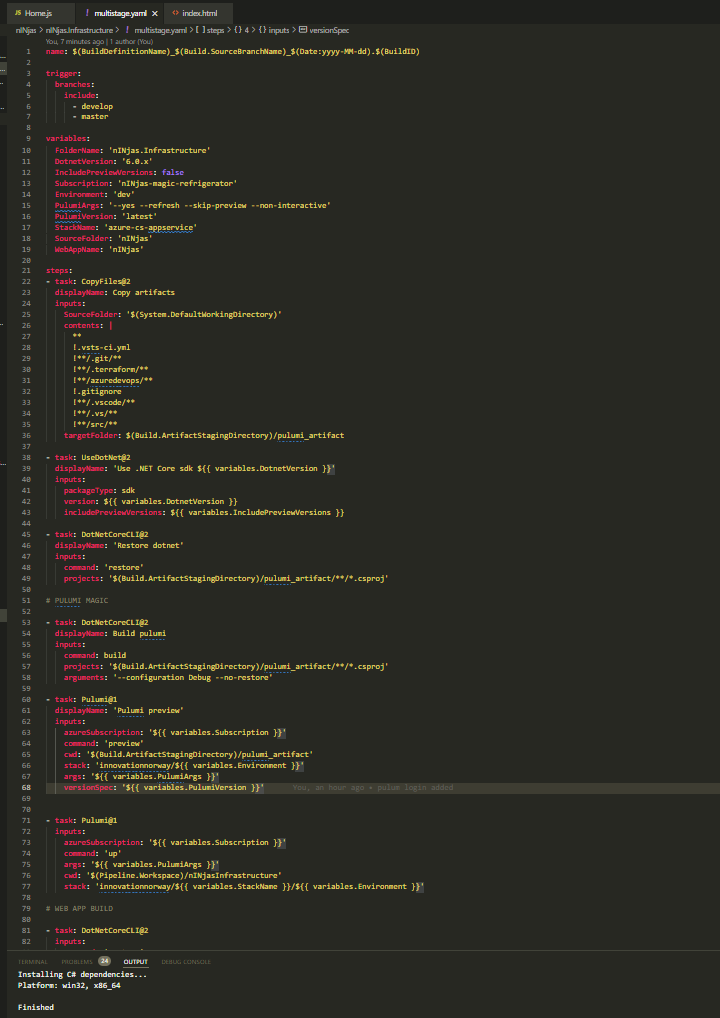
CICD as code with yaml
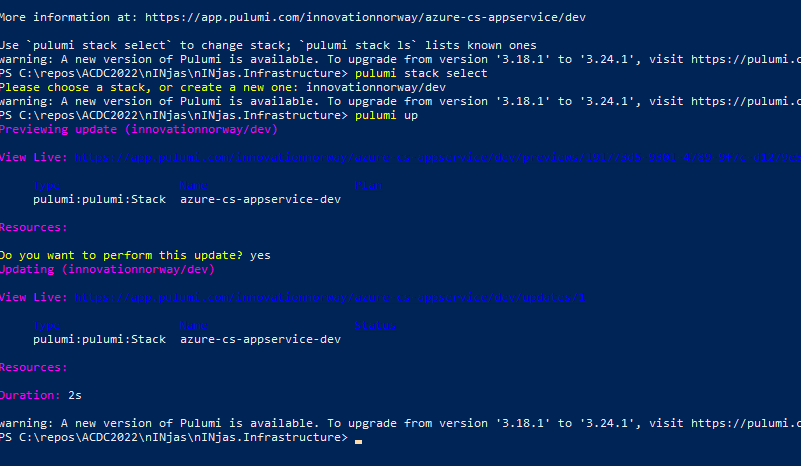
Deployment with the power of the shell
Vi har jobbet med å kjøre CICD i azure devops men har noen rettighetsproblemer så deployment er gjort med powershell:
Deploy infrastructure with pulumi commands in powershellFailed deployment in AzureDevops but with more time it will work!
MaMNT are aiming to keep technical debt to a minimum, and to maximize agility, extensibility, security and maintainability. Sure, we could rush ahead, building a quivering monolith on the brink of collapse. But this is about putting pride in your craft!
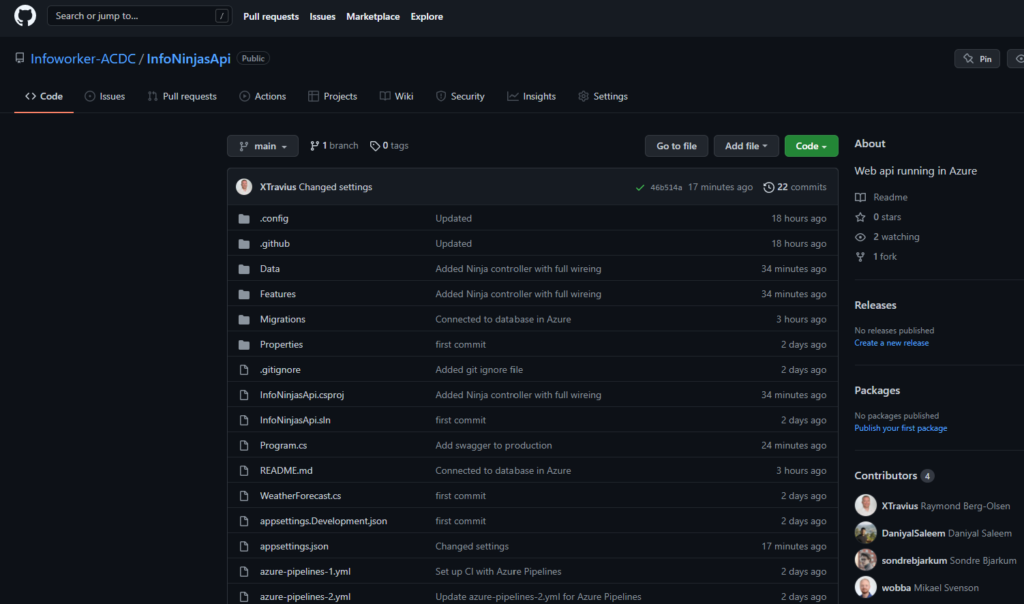
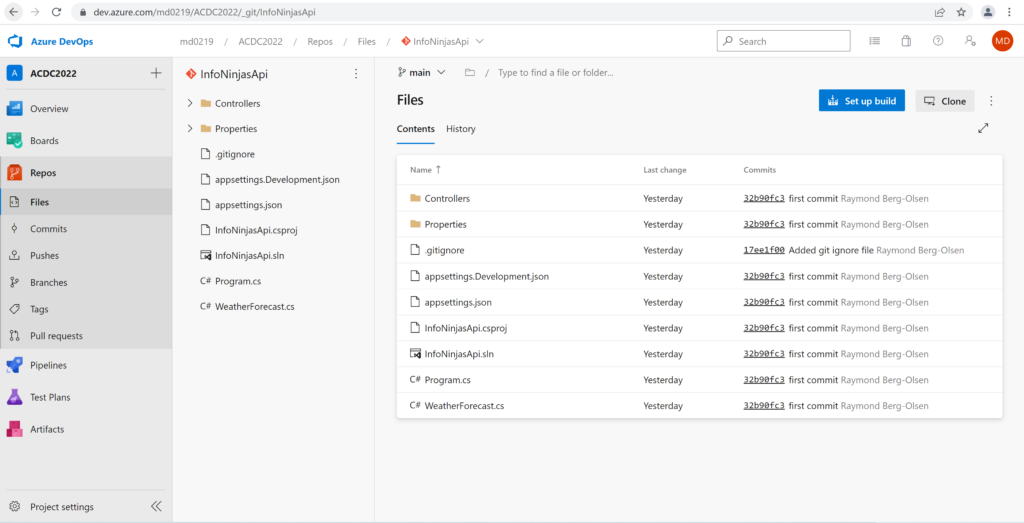
Code Repository
The code repository is hosted in GitHub as a mono-repo, split into individual subdirectories for different parts of our solution. Mono-repo is used by software giants such as Google and Microsoft, to make testing and development easier across apps and products.
Continuous Delivery
Continuous delivery is achieved through GitHub Actions: The gRPC server and Registration app are built and deployed to Azure App Service whenever changes to the apps are pushed to the main branch.
The Github Actions workflow (steps are minimized to save space)Deployment complete!
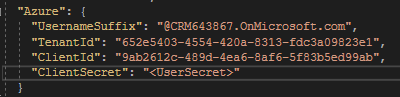
Secure secret storage
Of course, client secrets are kept out of the code. Secrets are kept in Azure Key Vault, and are injected as environment variables in the App Service.
The appsettings.json file does not include the Client Secret.The secret (Azure__ClientSecret) is added in Azure Web App through a reference to Key Vault, where the secret is stored.
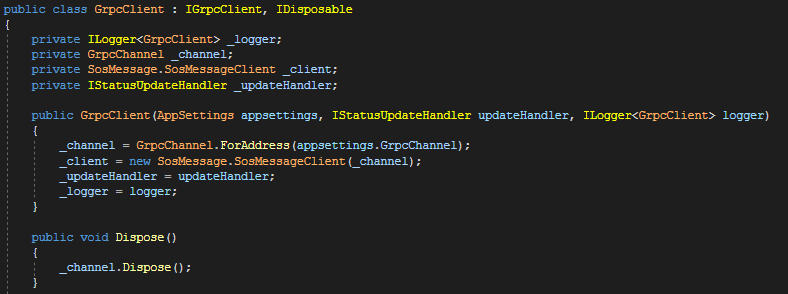
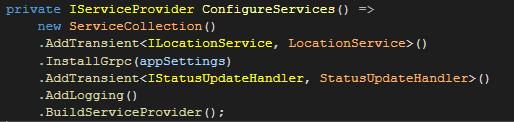
Inversion of Control
Following Microsoft and industry best practices, the software project uses Dependency Injection to achieve Inversion of Control. Our classes are stateless, and dependencies are injected from the service provider. Classes depend on abstractions instead of implementations, to make the solution more “plug-and-play” and simplify unit testing.
The GrpcClient class takes a StatusUpdateHandler as well as a Logger from the service collection. Appsettings are injected as well.The GrpcClient installer.Adding the required services in an app that uses the GrpcClient.
SOLID principles
We adhere to all “SOLID principles”. All classes and methods do one thing and do them well. Classes depend on abstractions instead of implementations. Interfaces are small and interchangeable.